LRPAD for Lightroom 4
We just released a small update for LRPAD, which includes support for Lightroom 4.0 controls. More stuff is coming up later 😉 The app is available in App Store.
Also, we have updated the plugin with higher resolution thumbnails for retina displays. Windows specific event-handling hack is now gone, it was maybe more trouble than it was worth (LR4 broke it, and it did not work well when adjusting multiple values at the same time). Plugin needs to be manually updated, you can get it from our download page
Film Perforation preset for Lightroom
We are currently in the process of planning new editing tools for LRPAD utilizing Lightroom 3’s internal image processing. The goal is to create new editing tools for tasks which are hard or even impossible to create using only Lightroom’s internal user interface. As we are using Lightroom’s preset functionality to apply new effects, we are also experimenting with the various features exposed by ready made presets.
One of the ideas was to create fake film perforation using Lightroom’s adjustment brush. Since this is maybe more of a trick than editing tool, we are sharing it here for free! The sprocket holes are implemented using adjustment brush layer set to Exposure -4.0 and Brightness -200. You can also modify the settings yourself, just remember to click on the pin and then adjust the layer settings (e.g. Exposure +4, Brightness +200 for white perfs, similar to what you see on a light table)
Lightroom 3
Download LRPAD Film Perforation Preset
Lightroom 4
There is a 2012 version of this preset available at http://capturemonkey.com/film-perforation-2012/
Photos
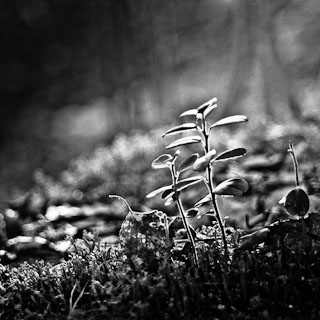
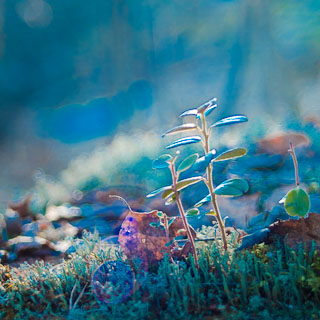
Here’s a couple of examples posted on Flickr, click on the image to open flickr page.
To install, unzip the package and move the folder to Lightroom’s develop preset folder (you can open it from Preferences)
On Windows, directory is: <userdir>/AppData/Roaming/Adobe/Lightroom/Develop Presets
On Mac, directory is: <userdir>/Library/Application Support/Adobe/Lightroom/Develop Presets
Restart Lightroom, so that it reloads the presets.
Free Lightroom Develop Presets
As a courtesy to all Lightroom 3 users, we are releasing some radical Lightroom develop presets totally free! We hope these help you to unleash your creative potential. Package contains 11 different develop presets in varying from low fidelity B&W to very colorful crossprocess effects.
Download LRPAD Free presets
To install, unzip the package and move the folder to Lightroom’s develop preset folder (right click on LR Develep Presets to find it, or navigate to folder manually).
On Windows, directory is: <userdir>/AppData/Roaming/Adobe/Lightroom/Develop Presets
On Mac, directory is: <userdir>/Library/Application Support/Adobe/Lightroom/Develop Presets
These preset have quite strong adjustments. If you feel like you would want tune them down a bit, you can try Lightroom preset fading plugin:
Sample pictures follow, first one is the original and then 11 different presets applied:


Coming soon: LRPAD 0.4
Last week, we finished the LRPAD 0.4 release and we are waiting for Apple to publish it in App Store.
Meanwhile, you can (and should) update the Lightroom plugin to version 0.4.
Apart from the plugin side updates, there is also new features in the app itself.
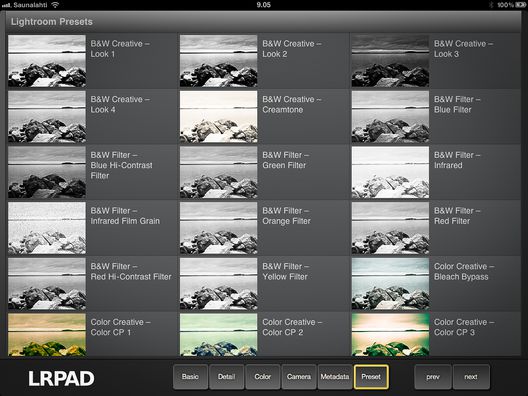
The most useful is probably the ability to apply develop presets from the app:

In the screenshot, you can see the thumbnails for Lightroom Presets. The plugin ships with pre-rendered thumbnails for standard Lightroom Presets, but you actually you can also customize the thumbnails yourself!
There is a plugin at http://www.knobroom.com/excessor/ which allows you to apply lots of your own develop presets, and this can be used to create thumbnails for LRPAD.
There will be a step-by-step post in the Knobroom site later on, after the LRPAD 0.4 is available in store.
UPDATE: Apple approved 0.4 release on April 3rd. It is now live in store.
Plugin version 0.4.295
Update: there was a packaging problem in r294, which prevented it to start for the first time on Windows. Fixed in r295.
Lightroom plugin has now been updated. The update provides support for upcoming iPad app update, and additionally it addresses the two annoyances which were reported by our users.
It is now possible to disable LRPAD keyword tagging in Plugin manager preferences. Our apologizes to everyone who felt cheated with this keyword tagging feature. However, all your existing images are still tagged, so if you want to get rid of LRPAD keyword: disable it from the plugin preferences and then delete it from keyword list.
Also, some users felt that automatic white balance adjustment to custom is interfering with their workflow. Now, it also has a checkbox in preferences. In 0.4 app, there is also a new white balance selection popup menu.
Finally, there is new experimental mode on Windows, which can be enabled from preferences. It uses direct window events to control on-screen sliders, which bypasses the Lightroom plugin API. It is only used for the most basic sliders, and the Develop screen must be active.
LRPAD tested on iOS 4.3 and minor issues with Lightroom 3.4 RC
LRPAD has been tested on iOS 4.3, and there are no issues found specific to new iOS release.
Adobe has released a release candidate of Lightroom update. This update has a glitch with LRPAD plugin on OS X, because the application is called “Adobe Lightroom 3.4 RC” and not “Adobe Lightroom 3” as the plugin expects. As a result, prev/next buttons launch the old version, which of course shows error, as your catalogue is already open with the next version.
Removing LRPAD Keyword
LRPAD adds “LRPAD” keyword to currently edited photo. This is intentional and it is used to mark developed images in case there is any need to do that in future (e.g. cleaning up extra develop history).
Here’s a tip for those who do not like to show the whole world that you are using LRPAD.
In Library view, open Keyword List and right click on LRPAD keyword. Select “Edit keyword Tag…”, and uncheck “Include on Export”. This way, Lightroom will internally have the keyword set, but the exported images do not carry LRPAD keyword.
For those who like tagging their images, here’s a link to Flickr with photos tagged with LRPAD
Section reset and other useful tips
There’s a feature in LRPAD that is somewhat hidden from most of the users — section reset. You can reset whole section to default values with a “long hold” on the section title.
By design, the sliders are meant to be operated without needing to actually look at the slider position. You can just drag your finger anywhere on the slider’s on screen position, the value is adjusted by the dragging move.
Additionally, all the sliders support adjustments in steps. Simply tap on either end of the slider to step up or down.
Youtube video
A quick video presentation in now live in Youtube!

